Working on my renderer sometimes leads to some hair-tearing moments when bugs start to come up. When you’re tracing millions of rays and you’ve got millions of pixels, tracking down a visual bug is very tricky.
This blog post is the first in a series where I’ll discuss what I did to debug certain bugs that I encountered. The series isn’t planned - when I get a bug which gives me a lot of grief, I’ll write down what I did to find it and fix it.
I’ll preface that my renders look slightly darker than PBRT’s. I have many missing features such as RR, MIS, QMC sampling, all which affect this. I also have very basic sample filtering (just a box filter) and the renderer is not feature compatible with PBRT. Other than that though, it should look close enough to PBRT.
When I implemented my glass material and compared the rendered image to PBRT there was a huge difference between them:
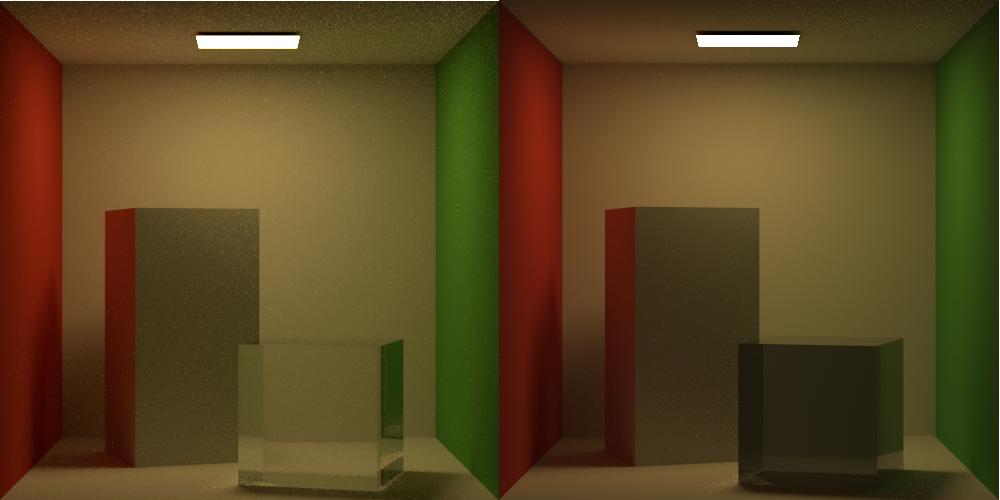
This is the kind of bug that is quite difficult to debug - you have specific paths related to specific geometry which are misbehaving. Of course I knew where the problem, it’s somewhere in the Glass Material and Specular Transmission and Reflection BxDFs ( or so I initially thought :) ).
The first thing I started looking at was my Fresnel functions. Since that’s the function that determines whether a ray is refracting or reflecting, this made sense to me. I computed the function for certain angles and certain reflective indices by hand and wrote unit tests to confirm matches which they did.
With this out of the way, I looked at the refraction function and did the same - however everything was fine here too.
At this point I knew I needed to get in deeper, so I had to write some utlity code to be able to walk through a single pixel path, using the debugger and not render a full frame until I get to that pixel.
Coding it up didn’t require a lot of effort however working out what the ray was supposed to be doing required a lot of hand calculations. Another way to do this is to use an open source renderer and debug it, PBRT and Mitsuba are the 2 obvious suggestions.
Once I started up the renderer and had my first ray intersection with the glass, the ray was supposed to refract into the surface. The next bounce was going to be inside the glass and hit the other side of the box from the inside, and exit. My ray did no such thing! As soon as it was refracted inside the box, it refracted again but for some weird reason, it went back inside the box (which is actually a reflection). I had a hunch something was up with my normals, so I had a look through the code that might have been modifying the normals and realized that I was prematurely face forwarding my normals when I was populating my surface interaction record right after the first intersection.
I had not noticed this bug before because I was not transmitting rays through a medium for the Mirror and Matte material so it was never an issue.
Fixing that bug significantly improved my image
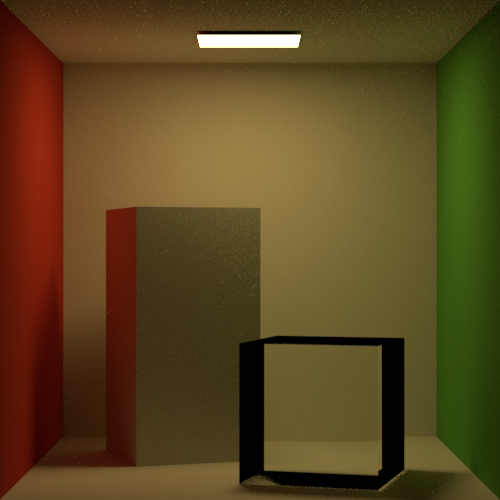
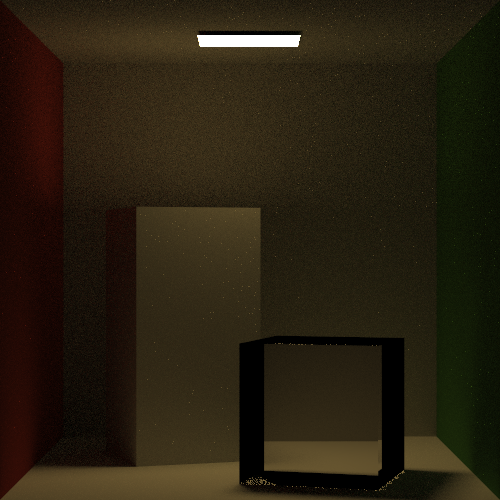
but this was completely different! I realized that having modified the normals during the surface interaction record population, another place where I was faceforwarding normals liberally was my Next Event Estimation code. I cleaned up this part of the code, rendered, got a match with PBRT and introduced reflection back in:
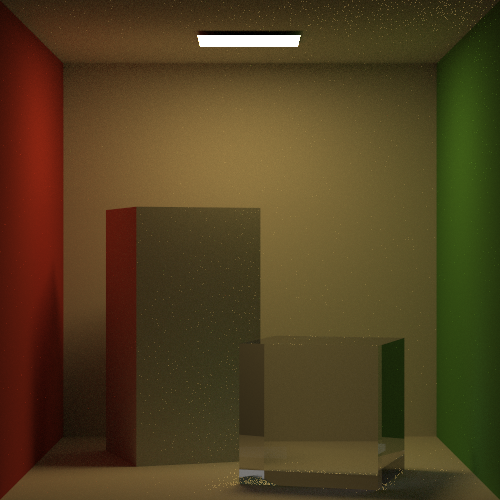
At this point I introducted the reflection back in but had a bug. I had been going at this for quite a few days (over a week), with only an hour or 2 to spare after work to look at this bug. So I took a bit of a shortcut and debugged a single ray through PBRT. This one I found with PBRT very quickly - I wasn’t setting the SpecularBounce flag to true when I was reflecting from a dielectric and so was computing direct lighting on a specular reflective surface. Fixing that gave me the final image:
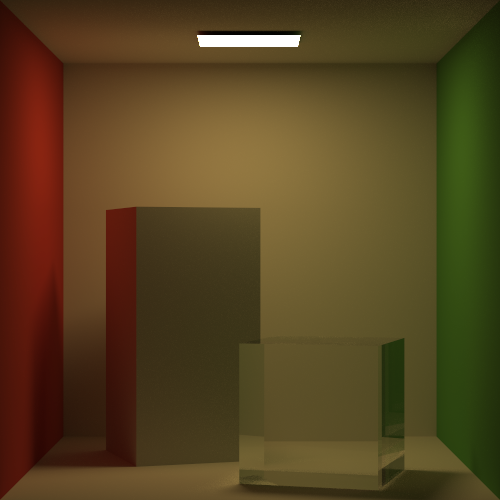
Which is pretty much what PBRT is getting albeit slightly darker.
One of the major pieces of advice I can give to people who are about to start their foray into ray tracing is the importance of unit testing. Testing every little function properly means that all the small moving parts work and gives you some peace of mind when using them and you’re hunting for a bug you might have.
I’m dedicating my August to just writing unit tests for my existing code - I was doing that for some stuff but in my haste to get some features up and running, I neglected that part and it bit me in the ass finally :) Having said that, I do look at bugs as a potential learning experience, and this kind of bug allowed me to gain a more solid understanding of surface reflection.
Another thing that was informative was following a path in PBRT. With a tool like the Visual Studio Debugger, this becomes quite easy.
One thing which I really want to do is render a single path, and in the mean time have my Vulkan engine draw the path and the normal of each surface intersection, and hovering over the intersection point, I can get the material details, the fresnel reflectance value if it was a specular surface, that kind of stuff. I have given it a lot of thought and would love to do this but time is a major obstacle.
That’s all I have today on this! The next post will probably be on debugging acceleration structures, the only issue is that I did the coding working on acceleration structures around February and as a result, my memory is a little hazy on my efforts so I might end up writing another acceleration structure to jog my memory and get new bugs, solve these problems and share the “wisdom”, with that, ciao!
comments powered by